It is important that HSP “Sent for Transplant” is recorded in the CTR as soon as possible. This ensures that the CTR’s general ledger for export thresholds is up to date. When the “Sent for Transplant” is recorded, the export is recorded in the general ledger. Previously, when the transplant was recorded, the import and export were recorded in the general ledger. When the transplant is recorded in CTR 2.0, only the import is recorded in the general ledger. The ODO must record the “Sent for Transplant” in order to register the export in the general ledger.
The General Ledger Report provides for each region, the net balance, exports and imports. The net balance is calculated by subtracting the exports from the imports (net balance=imports-exports). Note that the verification that determines if the donor’s region is at their export limit is done during the allocation process and is based on the donor’s ODO province. The General Ledger Report simply reports on the current net balance for a region by calculating the difference between imports and exports.
In order for the ledger to represent accurate information, it is critical that transplant centres record transplants and that ODOs record the “Sent for Transplant” in the donor record.
Recording that kidneys were sent for transplant can easily be done in the Canadian Transplant Registry. Follow these steps to record the export:
Note: In order to record a kidney as sent for transplant, you must first have run the allocation and have an accepted offer.
1. Locate and open the donor record
2. Click on the Recovery tab
3. In the Recovery section, enter the cross clamp date and time
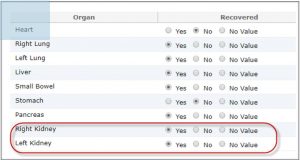
4. Select “Yes” in the Recovered column for the kidney that was sent for transplant
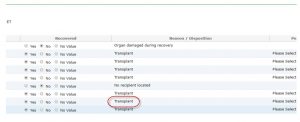
5. In the Reason column select “Transplant”
6. Identify is a perfusion pump was used for recovery in the last column
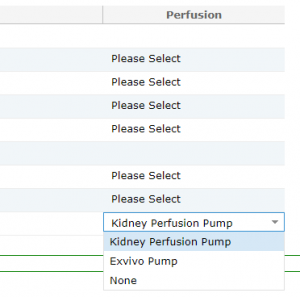
7. Click on the Save icon. You must save before proceeding to the Sent for Transplant section
8. Scroll down to the next section – Sent for Transplant
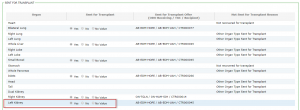
9. For the kidney that was offered to the HSP program, select “Yes” in the column Sent for Transplant.
Note that if you select “No” you will need to specify a reason in the Reason column
10. When you select “Yes” in the Sent for Transplant column, the offer details (ODO receiving, transplant
centre and recipient ID) are displayed in the Sent for Transplant Offer column. If no offer exists, you
will need to select the offer.
11. Click on the Save button
You may view the video outlining the steps to recording an exported kidney (sent for transplant) in the
Donor Recovery and Disposition video available here. A video on recording transplant and post-transplant
details is also available here.


